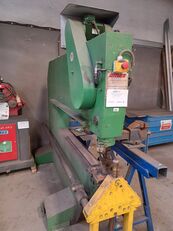
DEA Mistral 070707 coordinate measuring machine


≈ CA$35,260
If you decide to buy equipment at a low price, make sure that you communicate with the real seller. Find out as much information about the owner of the equipment as possible. One way of cheating is to represent yourself as a real company. In case of suspicion, inform us about this for additional control, through the feedback form.
Before you decide to make a purchase, carefully review several sales offers to understand the average cost of your chosen equipment. If the price of the offer you like is much lower than similar offers, think about it. A significant price difference may indicate hidden defects or an attempt by the seller to commit fraudulent acts.
Do not buy products which price is too different from the average price for similar equipment.
Do not give consent to dubious pledges and prepaid goods. In case of doubt, do not be afraid to clarify details, ask for additional photographs and documents for equipment, check the authenticity of documents, ask questions.
The most common type of fraud. Unfair sellers may request a certain amount of advance payment to “book” your right to purchase equipment. Thus, fraudsters can collect a large amount and disappear, no longer get in touch.
- Transfer of prepayment to the card
- Do not make an advance payment without paperwork confirming the process of transferring money, if during the communication the seller is in doubt.
- Transfer to the “Trustee” account
- Such a request should be alarming, most likely you are communicating with a fraudster.
- Transfer to a company account with a similar name
- Be careful, fraudsters may disguise themselves as well-known companies, making minor changes to the name. Do not transfer funds if the company name is in doubt.
- Substitution of own details in the invoice of a real company
- Before making a transfer, make sure that the specified details are correct, and whether they relate to the specified company.
Seller's contacts


 Portugal


Measurement uncertainty: 1.7 + 3L/1000, 1.9 [µm]
spindle speeds: 60-8000 rpm
conical tool: CAT-40
tool stations: 21
X axis measurement: 210mm
Measurement Interval: 0 - 972mm
Measuring area: X 700, Y 1000, Z 700 [mm]
Accuracy: E0, MPE from- (0.7+0.25L/100) µm
Forward Speed: 519 mm/s (3-axis)
3D travel speed: 500mm/s
cone iso: 40/50
Tension: 230 V
machine dimensions: 1.50x0.55x1.70m
Screen Diameter (in.): 16 "
Screen diameter (mm): 400
Motorized X-Y Axis: Optional
CNC control: Optional
Focus range (in): 2"
Focus range (mm): 50
Work Internship (in.): 21.25" x 5"
Working phase (mm): 540 x 130
control: CNCFanuc 18i-M CNC Control
Angular measurement resolution: 1 minute
profile lighting: Pattern
Surface Lighting: Pattern
Control system/software: QC100/200/5200, M2, M3
optical edge detection: optional
iris diaphragm: Optional
Precision Rotary Lathe: Optional
Precision Fixed Lathe: Optional
Cabinet Support 32": Optional
Cabinet Support 23": Optional
4-5th axis ready: Yes
Rotative desk: two-axis Nikken
Table dimensions: 30" x 70"
Load capacity: 2000 lbs.
main engine: 15 hp
3D Acceleration: 2500 mm/s²
Mass Load: 180 kg
load height: 560 mm
digital resolution: 500- 0.05 µm
700/900: 0.02 µm
Weight: 1.530 kg
Effective stroke L0 (mm): 120 (4.5")
System Type: Upper Workbench
Cable length: 3 mt
Accuracy (20°C): (3+3L0/1000)μm
Exit sign: Double sine wave with 90° shift
Maximum response speed: 50m/min
output signal step: 20μm
scale reference point: 50mm steps
Protection Level: IP53
compatible counter: KA counter / KLD200 counter
Operating Temperature: 0 to 45°C
Block Number: 1
Accumulated height (µm): 10
skate course: 600 mm
Perpendicularity: 5 µm (after compensation)
Repeatability: (2σ) Flat
Air Cushion: yes, full/semi-floating
Compensation method: counter balance
No. of memorized programs: 50 programs (max.)
stack autonomy: approx. 5 hours
measuring force: 1N
Imperial-Metric: Metric/Inch
Z axis measurement: 420mm
3D Coordinate Measuring Machine in high-accuracy gantry design that allows you to achieve exact results at lightning speed.
Note: Technical characteristics may not correspond exactly to the advertised product. We advise Customers to visit and find out the specifications of the equipment.
Incerteza de medição: 1,7 + 3L/1000, 1,9 [µm]
Velocidade de deslocamento 3D: 500 mm/s
Aceleração 3D: 2500 mm/s²
Máquina de Medição por Coordenadas 3D em design de pórtico de alta exatidão e que permite alcançar resultados exatos a uma velocidade relâmpago.
Nota: As características técnicas podem não corresponder com exatidão ao produto anunciado. Aconselhamos os Clientes a visitarem e a inteirarem-se das especificações dos equipamentos.